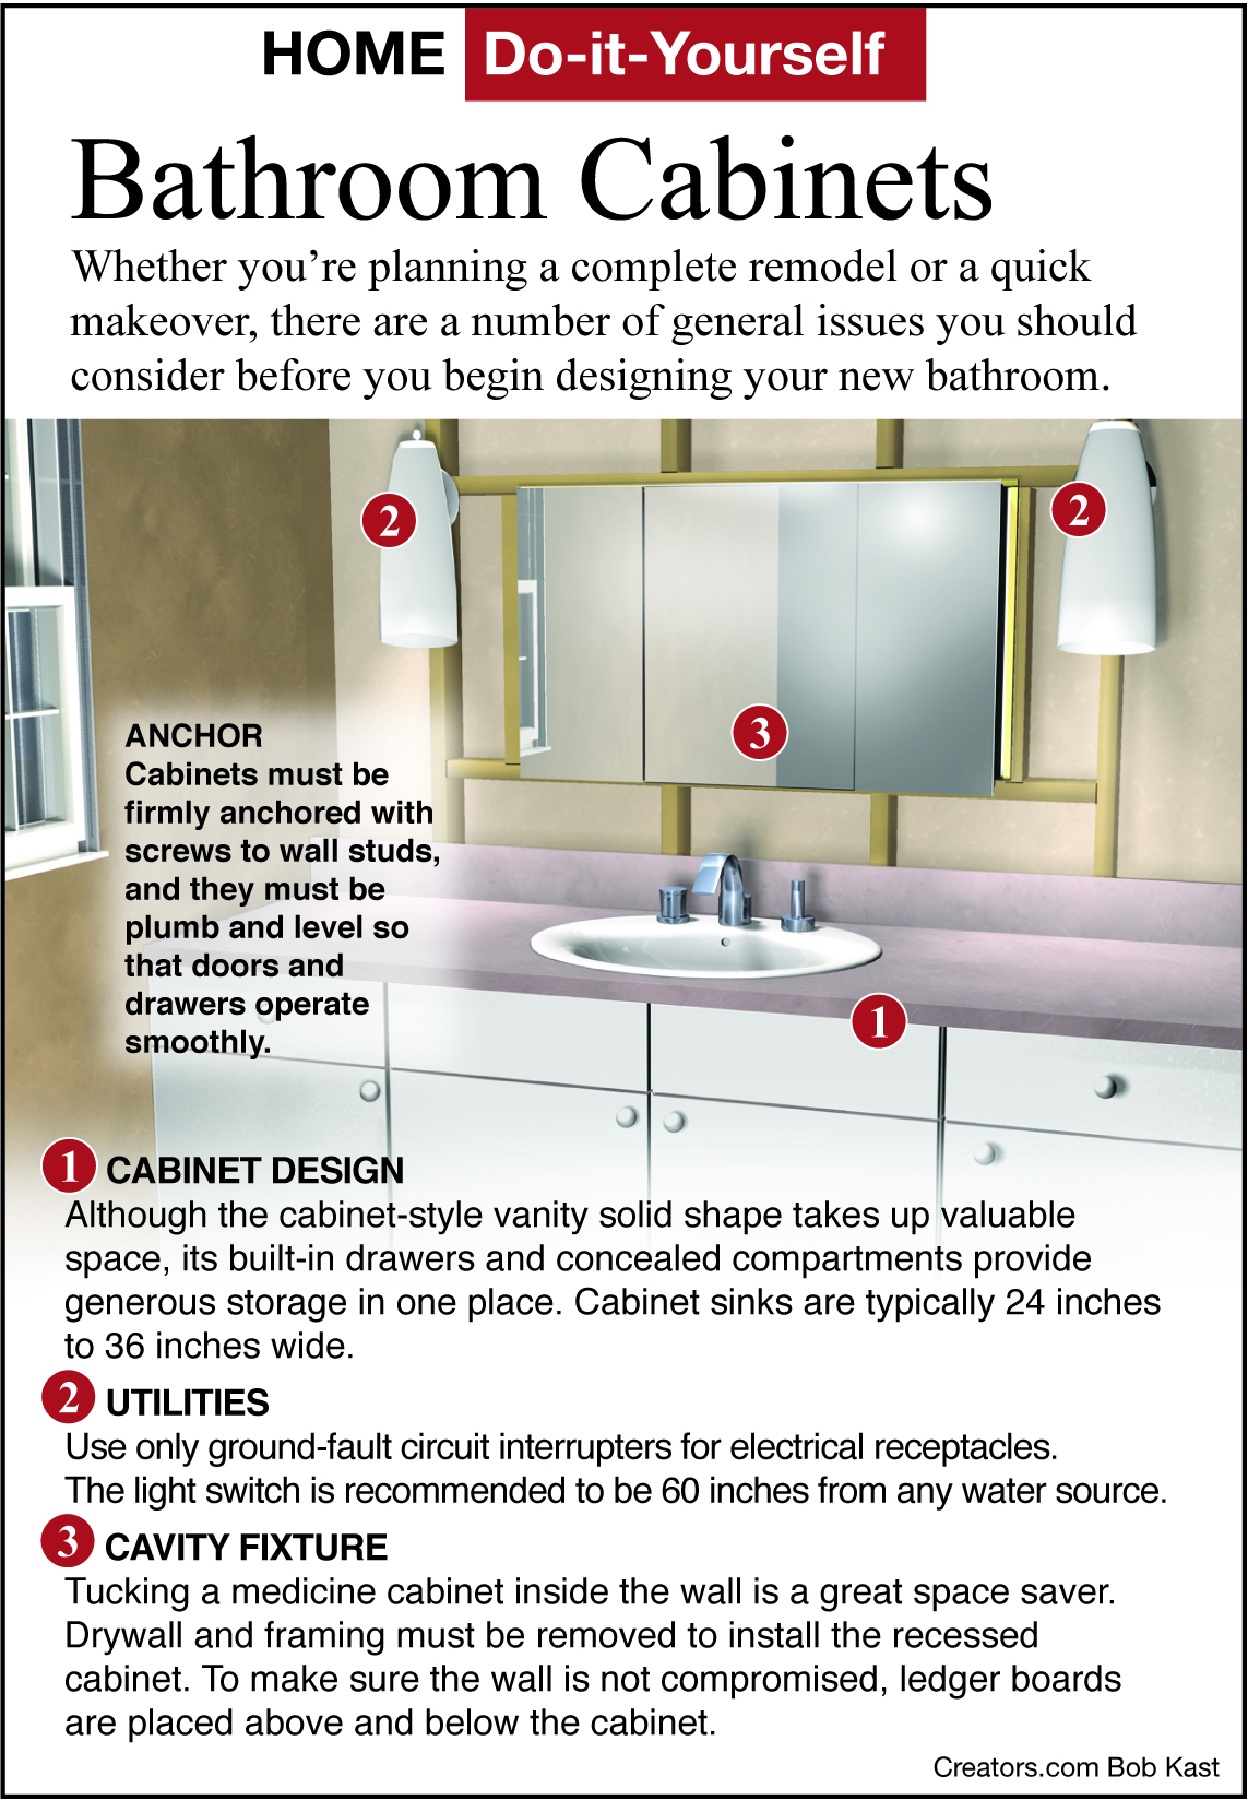
Dear James: I am planning a partial remodel of my bathroom with just a new vanity and cabinets. What are reasonably priced options, and can I easily install them myself? —Oliver J.
Dear Oliver: Just replacing the cabinets and vanity is the typical do-it-yourself bathroom remodeling project. A full remodel would include replacing the tile flooring and bathtub or shower area. Adding those often makes the project more complicated than most people can handle themselves.
Even when doing just a partial remodeling project, the cost can be significant. There is a huge selection and range of vanities and cabinets with varying prices. It would be wise to stay with the basic sizes you now have. This minimizes any plumbing, electrical, and other modifications that are needed.
There are simple design tips that can make a relatively inexpensive bathroom vanity cabinet look like a more expensive one. Vanity cabinets are actually three narrow cabinets combined. The center one holds the sink and each of the side ones either have drawers or a large-hinged door.
Size the depth of the cabinets so the center cabinet, which holds the sink, is offset and extends out several inches further than each of the side cabinets. The cost of the slightly deeper cabinet is not much greater than the others. This gives the vanity cabinet an expensive custom-made look at a low cost.
The least expensive way to finish this offset cabinet layout is with a standard rectangular countertop that extends out over each of the side cabinets more than the center one. If your budget allows, install a custom-made countertop with a smooth curved front edge that extends out over the center cabinet. This creates a more uniform countertop overhang over the cabinet fronts.
Installing the vanity cabinet is not a difficult do-it-yourself job. Almost all cabinets are designed to be screwed together from inside the cabinet so the screws are not visible. The most difficult part of the job is getting inside the cabinets to drive the screws.
Always remove the cabinet doors and any drawers before trying to assemble the vanity. This makes it easier to reach the screws and reduces the possibility of scratching the finish on the fronts or overextending and bending the hinges.
When selecting your cabinets, consider getting ones with quick-release levers to remove the doors from the hinges without having to remove all the hinge screws. With the doors and drawers out, the cabinets will be lighter and easier to handle.
For a professional-looking bathroom vanity, it is imperative the cabinet tops and fronts line up perfectly, unless you chose an offset design. The easiest way to accomplish this is to place a long straight edge along the top and sides. Once they are aligned properly, lock them together with rubber tipped clamps, and drive in the screws to secure them.
You may have seen some optional attractive face trim available for the cabinet fronts, doors, and drawers. These are usually installed from behind, so be very careful not to drill too deep or use a screw that is too long. If you do, you may pierce the front surface. If this happens, you will have to hire an expert repairperson to touch up the surface.
The final step is to make sure the vanity cabinet assembly is level from side to side and front to back. In most homes, the floors and walls are not true, so some small wood shims may be required. Always use screws, not nails, to attach the vanity cabinet to the bathroom wall.

Send your questions to Here’s How, 6906 Royalgreen Dr., Cincinnati, OH 45244, or visit Dulley.com. To find out more about James Dulley and read features by other Creators Syndicate writers and cartoonists, visit the Creators Syndicate website at Creators.com. Copyright 2021 Creators.com


Be the first to comment